
 Adult Medicine
 Behavioral Health
 Dental
 Endocrinology
 HIV/STD Screening & Treatment
 LGBTQ Services
 OB/GYN
 Pediatrics
 Pharmacy
 Senior Care
 Vaccinations & Immunizations
 Vision
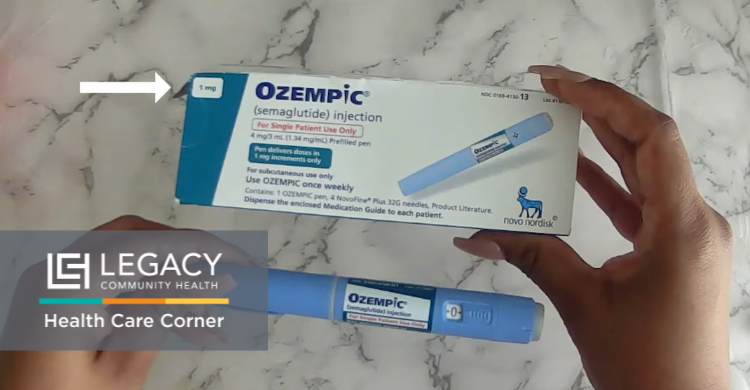
Clinical guidance from Legacy Community Health’s pharmacy team
Starting a new medication like Ozempic is a significant step in managing your diabetes. Many patients have questions about using the injection pen correctly, and that’s completely normal. With proper guidance and practice, using your Ozempic pen will become a confident part of your daily routine.
“Once my patients understand the steps, they find that giving their weekly injection becomes quick, simple, and part of their normal routine. It’s very manageable to do safely at home with a little practice,” says Wuen Hernandez, PharmD, BCACP, Clinical Pharmacy Specialist at Legacy Community Health.
Understanding Your Pen
Your Ozempic pen is available in different strengths, each identified by a distinct colored label for easy recognition:
- Red and white: Starting dose (0.25 mg or 0.5 mg)
- Teal: 1 mg dose
- Yellow: 2 mg dose
If this is your first prescription, you’ll receive the red and white labeled pen. Your health care provider will determine if you need to adjust to a different strength as your treatment progresses.
Required Supplies
Before beginning your injection, ensure you have these essential items:
- Your prescribed Ozempic pen
- A new pen needle (included in the packaging)
- An alcohol wipe for site preparation
- A sharps disposal container for safe needle disposal
Always attach a new needle each time you inject to ensure safe and effective treatment. Reusing needles may dull the tip, increase infection risk, and cause the pen to malfunction.
Preparing Your Pen
Begin by inspecting the medication inside your pen. The liquid should appear completely clear, not cloudy or discolored. If the medication appears cloudy, do not use the pen and contact your health care provider.
To attach the needle, remove the paper tab, then push and twist the needle onto your pen until it’s securely attached. Remove both needle caps (there are two) before proceeding.
Flow Check for New Pens
When using a brand-new pen for the first time, you must perform something called “a flow check” to make sure the pen works properly.
Turn the dose selector to the flow check symbol (it looks different from the numbers). Press and hold the dose button until the counter shows zero. You should see a small drop of liquid at the needle tip.
If no drop appears, try this up to six times. If it still doesn’t work, put on a new needle and try once more. If it still doesn’t work after trying a new needle, call the manufacturer because your pen might be broken.
Selecting Your Dose
Rotate the dose selector until your prescribed dose appears clearly in the dose counter window. Verify this amount matches your health care provider’s instructions.
Injection Site Selection
You can inject Ozempic in three areas of your body:
- Back of your upper arm
- Your stomach (stay away from your belly button area)
- Front or side of your thigh
It’s important to rotate between different injection sites each time you give yourself a shot. This helps keep your skin healthy and ensures the medication absorbs properly. If you used your right thigh last time, try your stomach or arm for the next injection.
Administration Technique
Clean the selected injection site with an alcohol wipe and let it air dry completely.
Hold the pen so you can see the dose counter throughout the injection. Put the needle straight into your skin. Press and hold the dose button firmly until the counter shows zero. Keep holding for an additional five seconds to make sure you get all your medication. Counting slowly to six after the counter reaches zero ensures you get your full dose. If you remove the pen too soon, the full dose will not be delivered.
Remove the needle in one smooth motion.
Post-Injection Protocol
Right away, remove the used needle and throw it away properly in an approved sharps container. If you don’t have a sharps container, use a thick plastic container until you can get one. Put the pen cap back on to protect the device.
Storage Guidelines
- Unopened pens: Store in the refrigerator. Never let your medication freeze.
- Pens in use: Can be kept at room temperature below 86°F (30°C) for up to 8 weeks. Throw away your pen after 8 weeks, even if there’s medicine left.
Frequently Asked Questions
What should I do if the dose counter stops before delivering my full dose? Get a new pen and call your pharmacy for help.
I missed a scheduled dose. How should I proceed? If it’s been more than 5 days since you missed your dose, skip it and take your next dose on your regular day. Don’t try to make up for it by taking extra.
Is travel with my pen permitted? Yes. Keep it in your carry-on bag so it doesn’t get too hot or cold.
Establishing Your Routine
Initial injections may feel unfamiliar, but technique improves with practice. Most patients report increased confidence and comfort within the first two weeks of regular use.
By the second or third dose, most patients feel much more confident. When our pharmacists provide the first injection demonstration, in clinic or at the pharmacy, patients are often pleasantly surprised by how simple the process is.
When to Contact Our Team
Reach out to Legacy Community Health if you experience:
- Redness or swelling at injection sites that won’t go away
- Problems with your pen not working properly
- Questions about when or how to take your dose
- Any other side effects that concern you
Your Path Forward
See our YouTube video for a visual demonstration of proper injection technique. For additional questions or concerns, reach out to our pharmacy team at Legacy Community Health.
Learning to use your Ozempic pen is an important part of managing your diabetes. Take time to learn each step and remember that our pharmacy team is here if you need help.
At Legacy, we believe in personalized care, making sure each patient feels confident, informed, and supported throughout their treatment.
This educational material is designed to supplement your health care provider’s instructions. Always follow the specific guidance provided by your medical team for your treatment plan.

 HIV/STD Screening & Treatment
 OB/GYN